Introduction :
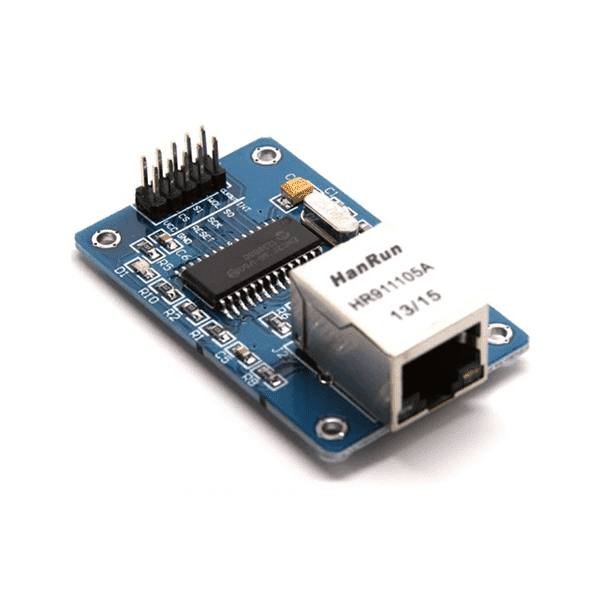
Ethernet Module (ENC28J60) uses the new Microchip ENC28J60 Stand-Alone Ethernet Controller IC featuring a host of features to handle most of the network protocol requirements.
Ethernet Module (ENC28J60) LAN module connects directly to most microcontrollers.
Features :
- Ethernet LAN Module for Arduino/AVR/LPC/STM3.
- ENC28J60 Ethernet chips.
- Can be easily mounted with the MCU.
- Network Interface: HR911105A.
- Supply Voltage: 3.3 V.
- 25Mhz crystal oscillator.
Applications :
- Chat server.
- Home automation system.
- Web client.
- Automated Garden.
- Web server.
- Barometric pressure web server.
How To Work :-
In this article, we will learn how to connect the ENC28J60 Ethernet module with the Arduino Web server to establish communication between the computer in the LAN or wireless network and the Arduino. We connect the ENC28J60 Ethernet controller with the Arduino so that our Arduino can become a member of the network. Once completed, the arduino can control things in the network, or the arduino can be controlled by other devices in the network. The connection between ENC28J60 Ethernet module and Arduino will further provide us with free use of the Internet on Arduino.
ENC28J60 Ethernet module uses Microchip ENC28J60 stand-alone Ethernet controller IC, which has many functions and can meet most network protocol requirements. The board is directly connected to most microcontrollers through a standard SPI interface, with a transmission speed of up to 20MHz.
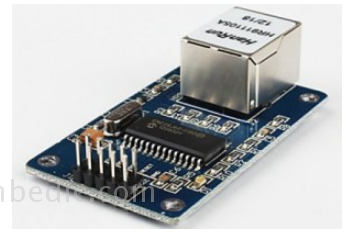
This Ethernet network module is the easiest way to add LAN connections to microcontroller-based products and projects.
1. Use this module to enable the Ethernet interface for your product. It can be used with any microcontroller that works at 3.3V or 5V.
2. The module works under 3.3V voltage and is compatible with 5V interface.
3. Use the SPI process to connect with others.
4. Host the web server, ping the module or add it to the home automation via the Internet.
5. The core of this module is Microchip’s ENC28J60 Ethernet controller.
6. The RJ45 network port with integrated magnetic device can reduce the size of the circuit board.
Block diagram and connection method:
The following is a simple block diagram that introduces how Arduino and ENC28J60 modules are connected to routers and computers.

The router should be connected to the LAN and should have multiple input and output ports. Connect one Ethernet cable from the router to the computer system, and connect another Ethernet cable to the ENC28J60 module. Similarly, the ENC28J60 module is connected to the Arduino. The connection between Arduino and ENC28J60 is as follows.
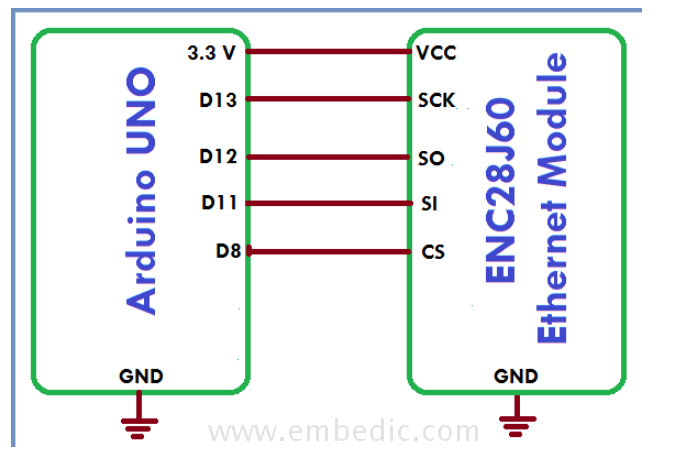
How to connect ENC28J60 Ethernet module with Arduino Web server:
1. Download the ENC28J60 library from here: ENC28J60 library
2. Add the library file to your Arduino IDE library:
3. After the addition is complete, open the sample, and then select the following sample from the Master Library:
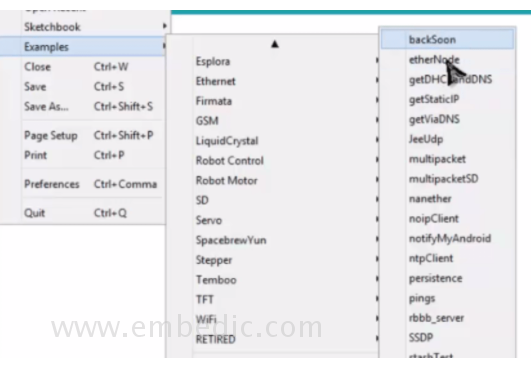
4. Compile the code, then upload the code to the Arduino UNO development board:
5. Open the serial monitor and copy the IP address:
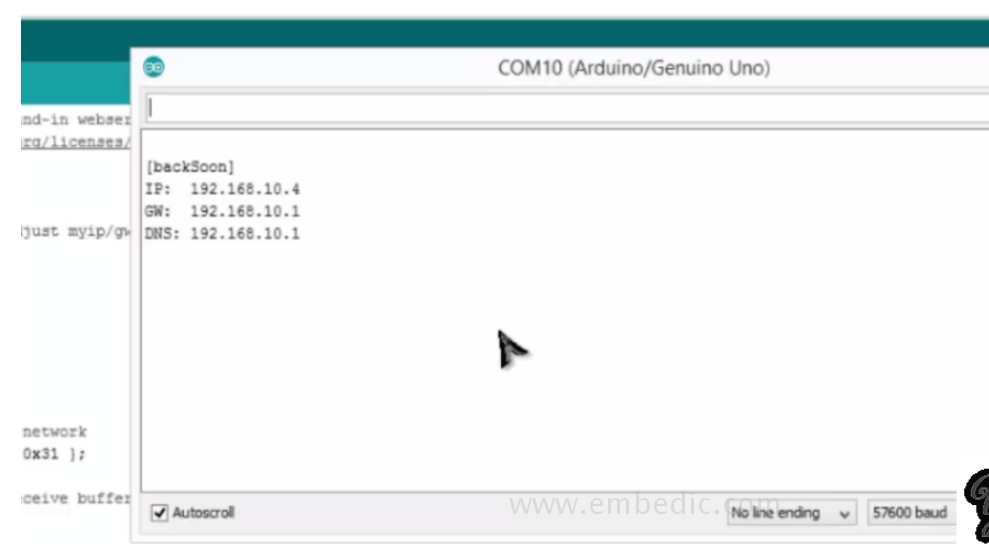
6. Open the web browser and paste the IP address, then press Enter:

Example code for connecting Arduino to ENC28J60 Ethernet module:
#include <EtherCard.h>
#define STATIC 0 // set to 1 to disable DHCP (adjust myip/gwip values below)
#if STATIC
// ethernet interface ip address
static byte myip[] = {192,168,1,200 };
// gateway ip address
static byte gwip[] = {192,168,1,1 };
#endif
// ethernet mac address-must be unique on your network
static byte mymac[] = {0x74,0x69,0x69,0x2D,0x30,0x31 };
byte Ethernet::buffer[500]; // tcp/ip send and receive buffer
const char page[] PROGMEM =
“HTTP/1.0 503 Service Unavailable\r\n”
“Content-Type: text/html\r\n”
“Retry-After: 600\r\n”
“\r\n”
“<html>”
“<head><title>”
“Service Temporarily Unavailable”
“</title></head>”
“<body>”
“<h3>This service is currently unavailable</h3>”
“<p><em>”
“The main server is currently off-line.<br />”
“Please try again later.”
“</em></p>”
“</body>”
“</html>”
;
void setup(){
Serial.begin(57600);
Serial.println(“\n[backSoon]”);
if (ether.begin(sizeof Ethernet::buffer, mymac) == 0)
Serial.println( “Failed to access Ethernet controller”);
#if STATIC
ether.staticSetup(myip, gwip);
#else
if (!ether.dhcpSetup())
Serial.println(“DHCP failed”);
#endif
ether.printIp(“IP: “, ether.myip);
ether.printIp(“GW: “, ether.gwip);
ether.printIp(“DNS: “, ether.dnsip);
}
void loop(){
// wait for an incoming TCP packet, but ignore its contents
if (ether.packetLoop(ether.packetReceive())) {
memcpy_P(ether.tcpOffset(), page, sizeof page);
ether.httpServerReply(sizeof page-1);
}
}

